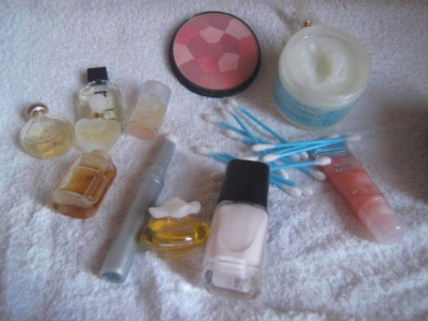
I find having a good, easily maintainable hairstyle also helps - clean, healthy, well maintained hair instantly improves your look and the opposite is just as true...
nothing destroys a look like dirty, unhealthy hair can.
Colouring your own hair is not only easy but is definitely a much cheaper alternative.
In fact, I have had a number of bad hair colour experiences at hair salons but so far (touch wood) no bad experiences after colouring my own hair.
Most hair colouring products come with detailed instructions but if yours didn't, then this is what you need to do:
- To make sure that you are not going to experience an allergic reaction to the hair colour, apply a little bit of the hair colour on the skin behind your ear, 2 days before colouring your hair.
- Wearing the gloves supplied, apply the hair colour on unwashed, dry hair. Part your hair in 4 even sections and apply the hair colour, starting at your routes. Carefully work the colour into your hair and wipe off any colour that sneaked its way onto your skin (along the hairline and behind your ears especially).
- Keep your eye on the clock and do not keep the dye on your hair for longer than the required time. Now you can step into the shower and rinse your hair. Once the water runs clear you can apply conditioner - leaving it on for a few minutes.
- Dry and style your hair as usual.
- MOISTURISE
It doesn't have to be the most expensive product on the market just a trusted name brand with sunscreen protection.
I don't like lotions as I find them too runny but you must use whatever you are comfortable with.
I use a day cream on my face and neck in the morning and at night before going to bed.
I rub the moisturiser in an upward motion.
My mother had beautiful skin with very few wrinkles and she didn't use any special soap and other lotions but she used a good moisturiser every morning and every evening...
and you guessed right - she rubbed it into her skin in an upward motion....hey - if it worked for my mom...
If you really can't afford to buy moisturiser, then make your own moisturiser.
Here's how:
Simmer 1 cup of evening primrose leaves, flowers and seeds and 1 cup of Aqueous cream in a double boiler for 20 minutes.
Strain the mixture and add 2 teaspoons of Vitamin E oil and 2 teaspoons of Almond oil. Pour the mixture into a suitable container and seal well.
This cream is also good for soothing sunburnt skin and dry skin.
Once every two months or so, I also use this homemade face mask and I have been doing this since I was about 12 years old.
It is very messy, so I usually put it on while I'm relaxing in the bath and then wash it off after about 10 minutes:
25ml Honey
1 Egg white
fine oatmeal
Mix the honey and egg white together and add enough oatmeal to form a thick paste.
Or make a smooth paste from a large tin of tomato puree mixed with 1 tsp of honey and oats. Rub it on your face and neck and leave it on for about 10 minutes and rinse off.
Another very easy face scrub you can make yourself is made by mixing
1 Tbsp oats
2 tsp of honey
1 tsp of olive or sunflower oil
and 1 tsp of freshly squeezed lemon juice.
Mix together until it forms a thick paste and apply it to your whole face, rubbing it in a circular motion.
Concentrate on your problem areas. Leave it on for about 5 minutes and rinse off.
Did you know that if you rub a clove of garlic on your spots, they'll disappear faster?
- TAME YOUR EYEBROWS AND KEEP THEM NEAT AND TIDY
I don't know about you but whenever I see a lady with really bushy eyebrows, I cringe....
Eyebrows frame your face - you wouldn't frame a beautiful masterpiece with an ugly frame, would you?
You are unique - a masterpiece - tame those brows!
Now, where do you start?
I suggest that you have your eyebrows professionally plucked the first time around and then just maintain the look.
But if you're brave enough and want to do it yourself - this is what you do...
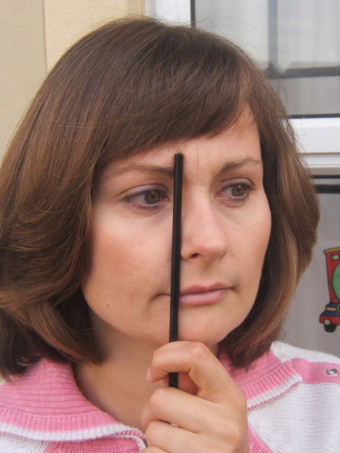
Take a pencil and place it straight up, next to your nose (stretching past your eyebrow) - this is where your eyebrow should start.
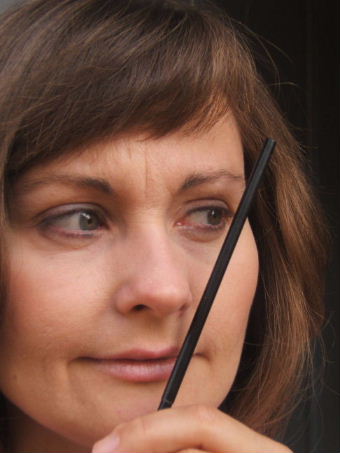
Now place the pencil, at an angle from your nose to the outer side of your eye (stretching past your eyebrow) and this is where it must end.
Now pluck the hairs that do not fall within these parameters.
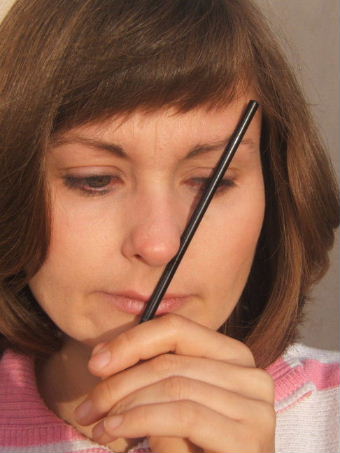
Next, place that same pencil at an angle from your nose, passing the outer edge of the iris...this will form the highest point on your eyebrow.
Carefully pluck your eyebrows at an angle - thicker in the beginning and thinning toward the highest point
- do not pluck the top hairs (those closest to your forehead) but instead pluck the bottom eyebrow hairs (those closest to your eye).
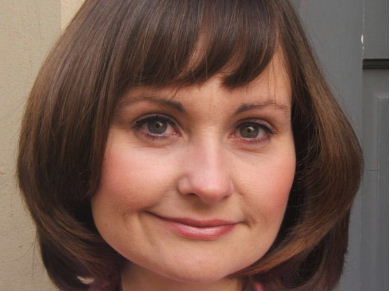
Once you've reached the arch (highest point) - ever so slightly thin your eyebrow again, so that it is thicker at the top and thinning towards the end.The end result should look something like this.
- PRACTICE BASIC MAKE-UP
I rub a tiny amount of petroleum jelly or glycerin over my eyebrows before combing them with my toothbrush, keeping them nice and neat.
I make sure I always have:
- Mascara
- Lipstick (for lips and cheeks) - I rub a small amount of lipstick on my cheek bone, rubbing it onto my cheek in a circular motion.
- and Eyeliner (optional) - I find this helps to frame my eye but you don't have to use an eyeliner.
- FRESH BREATH AND SPARKLY SMILE
Most times frugal living is a lifestyle choice born out of financial hardship.
I often joked and said that "there's not enough money for my month" meaning that I ran out of money long before the month was over....
This sometimes meant that we ran out of certain essentials like toothpaste....
So I had to learn how to make my own.... in case of an emergency.
This is how:
Make a paste out of 30ml finely ground lemon peel, Bicarbonate of Soda and fine sea salt. Use it as you would use normal toothpaste.
Yip! That easy.
- FEET AND HANDS
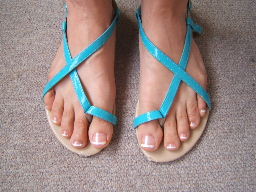
Keep your nails clean and neatly cut/filed.
After my shower/bath in the evenings, I usually rub cream into my legs and feet, especially my heels.
This will prevent them from drying out and cracking.
Every now and again you can even treat yourself with a do-it-yourself
Manicure
or a
Pedicure
.
Make your own hand and nail cream by:
Simmering 1 cup of echinacea petals, leaves, chopped stem and root with 1 cup of aqueous cream, in a double boiler for 20 minutes.
Strain the mixture and add 2 teaspoons Vitamin E oil, 10 drops lavender essential oil, 10 drops lemon oil and 10 drops tea tree oil. Place it in a suitable container and seal it well.
This cream is also an excellent treatment for rashes and insect bites.
You don't have to spend a lot of money on lotions and potions in order to look good. Just invest a bit of time in yourself.
Take special care of yourself you deserve it.
Also your husband will appreciate it if you take the time to get out of those sweat pants and put a bit of make-up on for when he arrives home.
You'll be surprised how a little bit of make-up can lift your spirits.


